
Selecting the Best Foot Doctor: Pointers to Consider
A lush and vibrant lawn is like a beautiful crown for your outdoor area, and the secret to achieving it often begins with the right foundation: installing sod.
While the idea of unrolling an instant green carpet might seem simple, there are several important steps and techniques that can turn an ordinary lawn into an extraordinary one. In this detailed guide, we’ll take you through the process of laying sod seamlessly, offering expert advice and handy tips every step of the way.
Step 1: Get the Ground Ready:
Before you start putting down the sod, getting the ground ready is really important. First, clean up the area by removing any trash, rocks, or weeds. Then, use a shovel or a rototiller to dig the soil about 3 to 4 inches deep. This helps the sod’s roots go deep into the ground.
Step 2: Make It Even:
Having a flat and even surface is a must for a good lawn. Use a rake to smooth out the soil and make it a bit sloping. This helps water flow nicely and stops it from collecting in low spots. This way, the grass will grow evenly everywhere.
Step 3: Check the Soil:
Knowing how healthy your soil is matters for a nice lawn. Test the soil’s pH and nutrients to make sure it’s good for grass. If needed, add things to the soil to make it better. This helps your new grass grow strong and healthy.
Step 4: Measure and Get Sod:
Measure the area accurately so you know how much sod to buy. When you order, make sure the sod is fresh and not old. It’s better to use sod that was cut recently because it has a better chance of growing well.
Step 5: Pick the Right Time:
The best time to put down sod is during the cooler times of the year like spring or fall. This helps the sod’s roots grow before it gets too hot or too cold. Avoid laying sod when it’s super hot in summer or really freezing in winter.
Step 6: Handle with Care:
Be gentle with the sod. Ensure it remains moist and avoid letting it become dry. If you can’t put it down right away. Maintain its moisture and prevent it from drying up. This stops it from drying out.
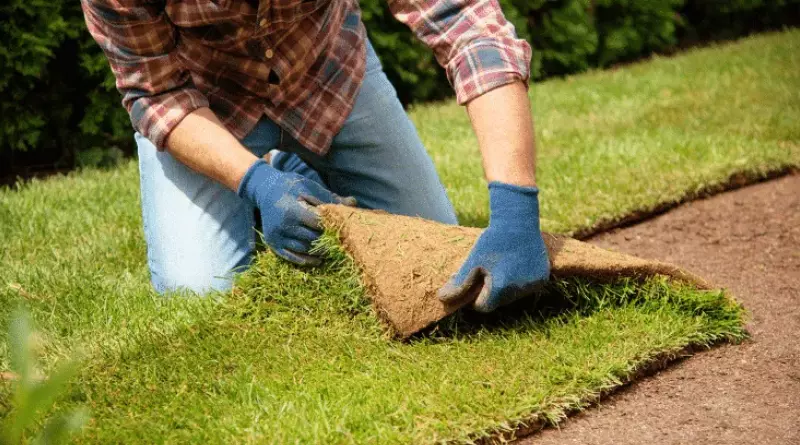
Step 7: Start Laying:
Put the sod down along a straight edge, like a sidewalk or driveway. Put the pieces close together, but don’t overlap them. Make sure the edges are touching. Arrange the seams like bricks to make it look natural.
Step 8: Cut and Shape:
Use a sharp knife to carefully trim the grass around objects like trees, flower beds, and pathways. Make sure to tidy up the edges for a pleasing appearance.
Step 9: Press and Water:
After you’ve put down the sod, press it down with a roller so it touches the ground well. This stops air pockets and helps the roots grow. Water the new sod a lot to make sure the soil under it gets wet too.
Step 10: Watering Routine:
Water is really important when you start with sod. Keep the sod wet for the first few weeks so the roots can grow strong. Once the roots are better, water less often but give more water each time.
Step 11: Mow and Take Care:
After about 2 to 3 weeks, the sod will be rooted well. Now you can start mowing. Make sure your mower blades are sharp and at the right height. Mow regularly and take care of the lawn by adding fertilizer and watering it right.
Step 12: Be Patient:
Laying down sod gives your lawn a fast makeover, but remember that it needs time to become really healthy and green. Stay patient and keep looking after it. If you keep up with taking care of it, you’ll eventually have a gorgeous lawn.
conclusion
In conclusion, laying sod is a wonderful way to quickly have a beautiful green lawn. If you follow these helpful tips, you’ll start on the right path. Getting the ground ready, treating the sod gently, and taking good care of it will make sure your lawn grows beautifully for a long time. So, get ready to make your outdoor space vibrant and lush with effortless sod installation!